
I love making crafts that are simple and can be done fairly quickly.
I came across a sign i loved on Pinterest, but my relationship with Pinterest is not always a good one. I’ve tried numerous things that just wind up overwhelming because either something was left out of the steps, or it looked a lot easier then it actually was.
I figured I’d give it a try and with imperfections and all, i really love the outcome!
These steps can be done for any sign you’d like to create from scratch. Here are are steps;
I was able to get a thin piece of plywood from a box at work. It is about 2′ x 3′ which was just the right size I wanted. I lightly sanded the sides of the plywood because it was splintering all over.
Next, I took some white acrylic paint I had on hand and just lightly coated the board.
Then I added some text from my “Phonto” app on my phone, and then sent them to my computer to print and printed and taped them where I wanted then on the board.
After that, since I didn’t have any carbon paper, I added led to the back of the printouts, and then traced over then to transfer the lettering onto my board how I wanted it.

The tracing takes a little bit of time, bit it’s worth it to get the font you want looking nice and neat.
My issue is, with the next step, which was using the black & red acrylic paint, I didn’t have a small square tip paint brush on hand, so I used a small rounded make-up brush I had laying around (yes I did). It worked great except it was hard to square my letters like I wanted and they came out a bit rounded and no longer perfect. I figured it was OK because I’d be sanding it next to give it a vintage/rustic look.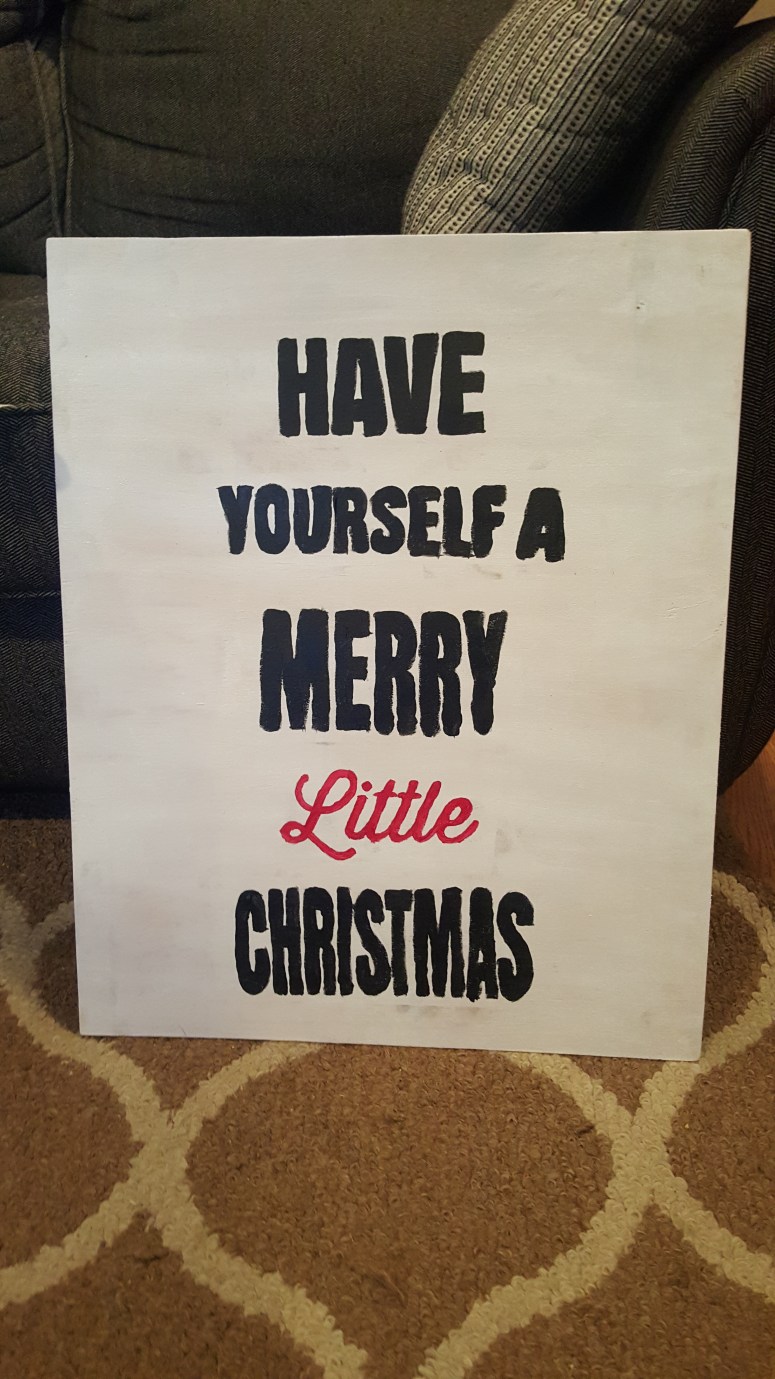
^ This was before sanding and you can see how my painting didn’t go so well.
To sand this, you can do it by hand with sandpaper but I had a small orbital sander on hand and used a 60 grit paper on it. I did a little deeper sanding in some areas and lighter in others to give it the look I wanted. You can see where it’s just about down to the plywood. It also allowed me to make my letters look a little better and the imperfections to almost disappear.

The last step I did was add a light gray stain. I used “classic gray” from Minwax, it’s only $4.50 for a tiny jar that’ll last forever for craft projects.
I almost want to say I could’ve done without this step. I feel like I looked the white a bit brighter and I might sand it down a little to take some of the stain off, but I’m torn. I do like the way it turned it more rustic looking and I don’t have to work about it getting dirty since I’m using it as a holiday decoration on my front porch.
Let me know what you think and if you wind up trying this project!

